TL;DR
**Software: **Broadcasting Software, Keyboard Shortcuts Tool
**3rd Party Services: **Community Building, Audio Routing, Background Music
Software Setup
Check out the first part of this series to learn about which hardware I’m using. But here’s the software side of things, the most important streaming-related apps including price, my settings, and some alternatives to consider.
Broadcasting Software: SE.Live (OBS with plugins)
ℹ Description:
The heart of all streams is the braodcasting software. This is what produces the live video & sends it to Twitch (or other platforms like YouTube) as a combination of many different sources. I use it to capture my screen, my webcam, apply a green screen filter, capture my microphone audio, run filters on the audio, run background music, show stream-related alerts like follows, provide sound alerts, switch between different scenes e.g. when I start/stop the stream or have a break.
This is quite a lot of things in one software, so it’s really important to choose the right tool here. The good news is, there’s an open-source project for this named “Open Broadcaster Software”, short “OBS” with 37k starts on GitHub with lots of features that other companies can rely on. I use the StreamElements variant because it’s very close to the original OBS Studio with some extra plugins for community building purposes.
💰 Price: Free (the OBS base is fully Open Source, the plugins are not)
⚙️ My Settings:
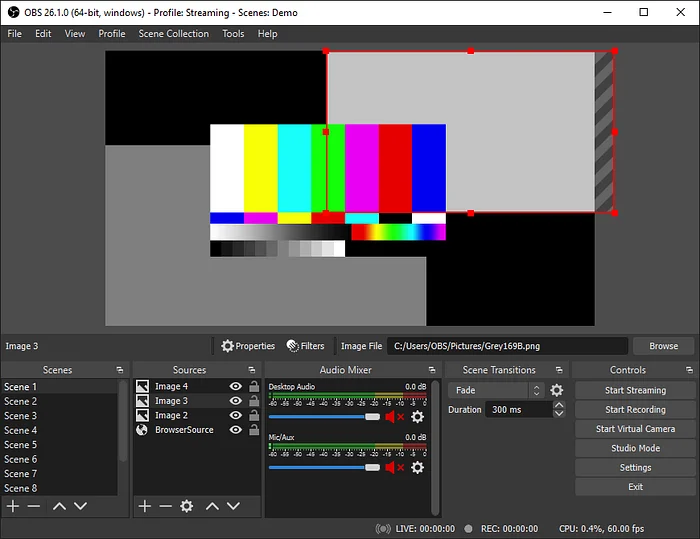
I basically set up two types of scenes: When I’m not visible and when I am. For the latter, I downloaded a nice background video from Pixabay and added a dim layer on top of it so the screen feels alive even if I’m not there. I’ve created 3 scenes (before/break/after) with basically the same setup but different text:
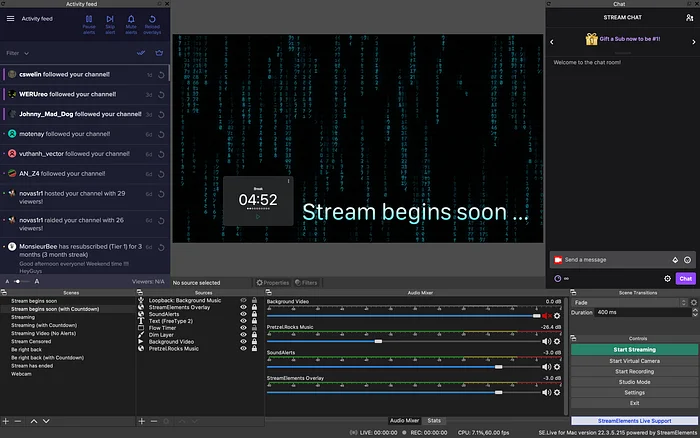
For when I’m streaming, I also have 3 scenes: One with a Pomodoro timer (currently using the Flow app, but gonna use my own Open Focus Timer once it’s ready), one without a timer (e.g. at end of stream) and one with screen censored (e.g. when I need to sign in/up somewhere). After many tries, I decided to place myself at the bottom right of the screen (but not the edge):

For my webcam, I have set up a “Chroma Key” filter for the green screen:

My audio settings are a little more advanced. First, my mic settings. I’m using 4 filters for my mic which seem to be all recommended by audio pros:
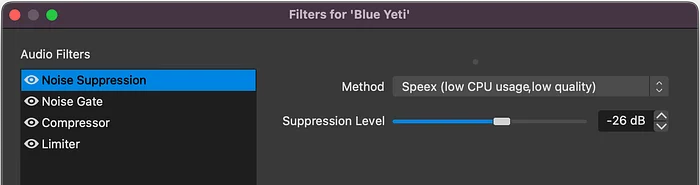
“Noise Suppression” helps filter out background noise such as loud fans.
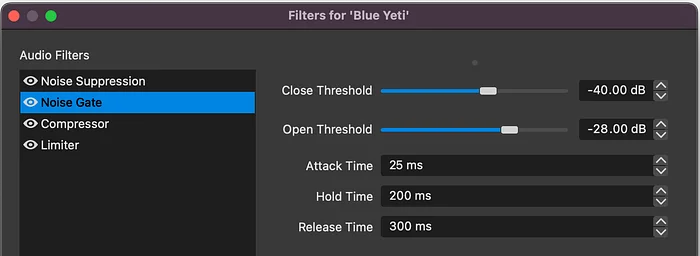
With “Noise Gate” I can completely “turn off the mic” if a specified loudness threshold isn’t met. This helps remove keyboard typing when I’m not talking.

Sometimes people can get very loud when they are surprised by something. Imagine I’m visiting a website and there’s a jump scare. To not bother my viewers with a sudden loud noise from me, I’ve setup a “Compressor” to “compress” any loudness above a given treshold by a factor of 10.
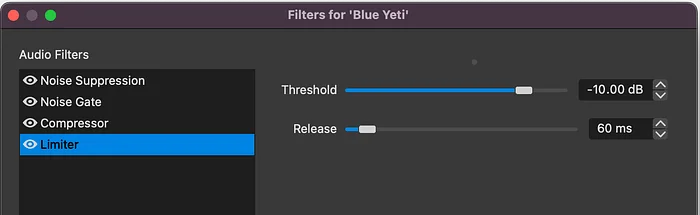
Lastly, the “Limiter” does a very similar thing to a compressor, but instead of “compressing” the extra audio by a customizable factor, it simply always uses the factor “infinity” and therefore limits the loudness to a given max.
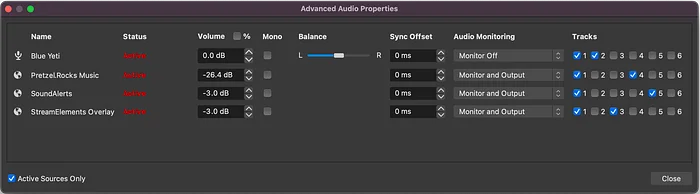
Let’s move on to other audio settings. Two things should be noted here: First, there’s a concept called a “monitor”. A monitor is the audio you as the streamer will hear back. For example, if you turn the “monitor” on for your mic, you will hear yourself on your headphones. I have it turned on for everything except the mic as it feels weird to hear myself (with some delay). Second, for each audio source, you can specify an audio track number. This is useful if you plan to edit your videos later, e.g. to produce more narrowed-down YouTube videos (like I plan to do). For example, I’m putting my voice on its own track, the background music on another one, and all sound alerts on yet another track. This way I can cut the video source and keep parts of my voice without having the background music “jump”. And I can remove alert sounds entirely or change their volume independently if I need to. See here:
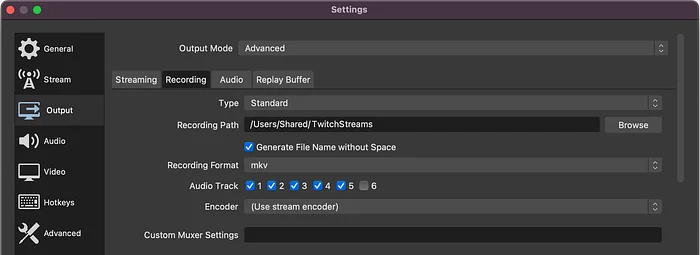
Additionally, I set up all my streams to be recorded to a .mkv file automatically with all the audio tracks from 1 to 5. See here:
That’s a selection of my OBS settings, but not all. There’s so much you can do with OBS that it can be intimidating. For example, I skipped Browser sources.
⎇ Alternatives:
– Streamlabs Desktop: Free (Open Source), custom OBS UI (matter of taste)
– Ecamm Live: $400 per year, native Mac app, easy but limited flexibility
Keyboard Shortcuts Tool: KeyCastr
✨ Want to see your ad here? Contact me at [email protected] to get in touch.
3rd Party Services
These are the 3rd party services I’m using and every streamer should consider.
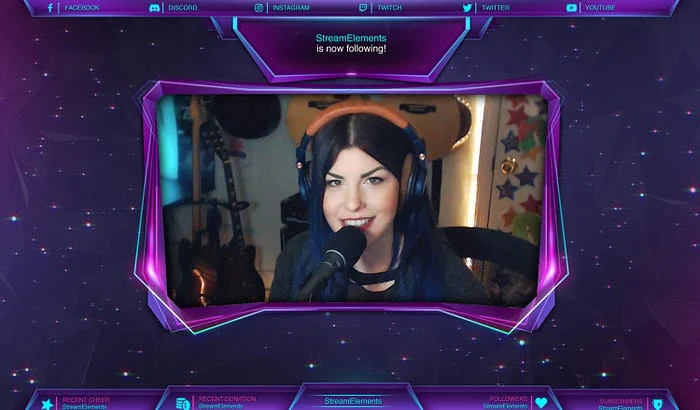
Community Building: StreamElements
ℹ Description:
What makes streaming really fun is the interaction with your viewership. While Twitch as the streaming platform provides a built-in chat, there are so many more ways to interact with your community. For example, you might want to show in your stream an alert when somebody follows you to give the viewer the feeling of truly being part of the stream. Or you want to celebrate with an on-screen animation when another streamer raids you. And you probably have some reminders like links to your socials you want to share with your always changing viewership. These and more features are provided by third-party services which I highly recommend you use at least one of to stay connected with your viewers and build a community of fans over time.
💰 Price: Free (they take a cut if you use their Merch Store or Partnerships)
⚙️ My Settings:
StreamElements provides many features, but I’m using mostly 2 of them:
First, I’m using their Alerts & Overlays Feature with a custom overlay. The two most important layers I’ve setup are the Alert Box and the Kappagen ones:
ℹ Description:
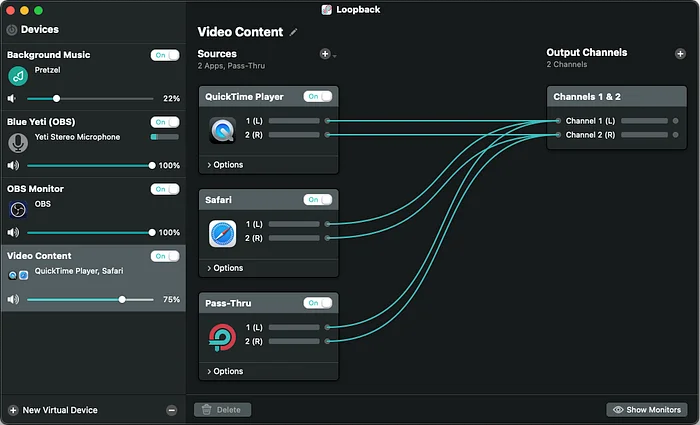
Apple is securing macOS on many levels. One of them is the protection of system audio: By default, there’s no way to fetch audio output from other apps into OBS so your viewers can hear the same as you do. This might be useful e.g. if you want to play background music in a dedicated music app or watch a tutorial video and comment it live. There is a way to turn off some security features and give apps access to system audio, but OBS doesn’t support that (yet). So you’d need extra software that routes audio from other apps or your system into a fake “virtual” microphone, which you can then add to OBS as a source like any other mic. You can find a nice detailed slideshow for how to set up the tool on both Intel & M Chip Macs here.
💰 Price: $99 (one-time payment)
⚙️ My Settings:
The most important setting here is the “Video Content” device because it provides me the audio from videos I may play using QuickTime or Safari.
⎇ Alternatives:
– Blackhole: Free (Open Source) — haven’t tried it, but looks very similar
Background Music: Pretzel
ℹ Description:
A coding session without some relaxing background music is very tiring to me. I think it is even more important to have some good background music if you are live streaming, as you’re probably not going to talk the whole time and the pauses can feel weird as a viewer if there’s no noise at all. At the same time, licensing music is a complicated topic and you are not allowed to stream everything on Twitch. In my case, I am also uploading my streams to YouTube and the rules are different between these platforms. Generally speaking, more is allowed on Twitch, and even more is allowed if you turn off the “video-on-demand” feature on Twitch, so viewers can only listen to the music while you’re live and there’s no way to watch it later.
But if you do want to provide recordings of your streams long-term, you have to find some “royalty-free” music or at least have a license for the music you use, otherwise, you might get a DMCA takedown of (parts of) your videos. If you do this repeatedly on either YouTube or Twitch, your channel might even get banned. Don’t risk it and make sure you conform to the rules.
💰 Price: Freemium ($15/month to remove chatbot posting every song)
⚙️ My Settings:
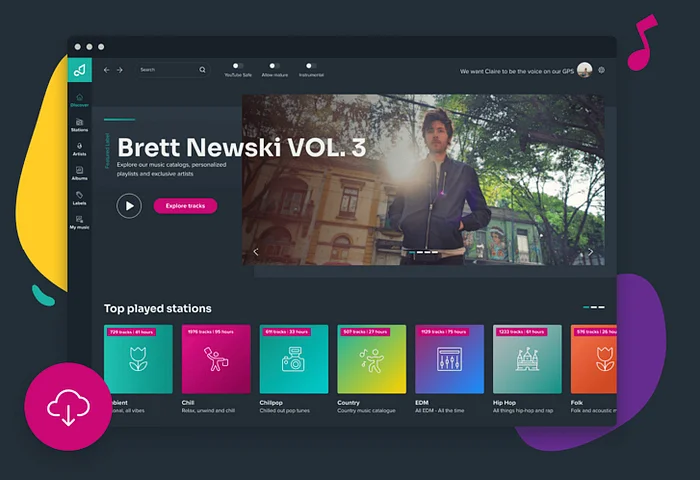
I always have “YouTube Safe” turned on. I used to have “Instrumental” turned on and play the stations “LoFi” and “Chill” a lot. But lately, I have started to listen to the “Rock” station as well, and with that filter, there were no songs, so I keep the “Instrumental” filter off now.

My preferred Pretzel settings.
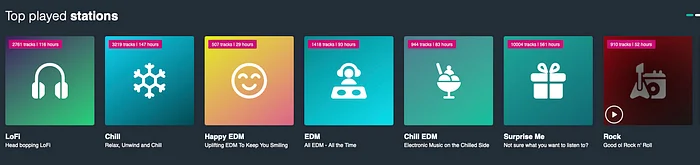
LoFi, Chill and Rock are part of my favorite stations.
⎇ Alternatives:
– Monstercat Gold: $7.50/month, supports music download
– Playlists on Apple Music / Spotify / Amazon Music, e.g. from Anjunabeats
– Here’s a list of more alternatives
Next Up
This wraps up the software I use & how I have them configured — it should get you another step closer to your own live streams. In part 3 of this series, I will be covering my system settings and some other tips you should keep in mind while streaming software development on Twitch. Follow me to not miss!
💁🏻♂️ Enjoyed this article? Check out my app RemafoX! A native Mac app that integrates with Xcode to help translate your app. Get it now to save time during development & make localization easy.