Just a few months ago, I released CrossCraft: Custom Crosswords, an app written entirely in SwiftUI and available on iOS, iPadOS, and macOS. For the launch of the Vision Pro, I set myself a challenge to migrate it to the new visionOS platform – but I started the migration just 3 days before launch day!
So the question was if I would be able to pull it off in this short amount of time. But luckily it turned out to be easy enough, so my app was ready on Day 1! 👇

The official email from Apple, thanking Day 1 app developers.
The following are all of my learnings that could help you migrate your apps, too!
3rd-Party Frameworks
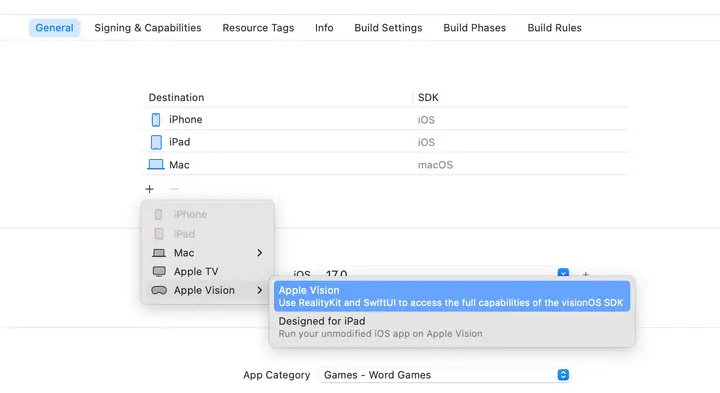
After adding the “Apple Vision” destination to my project, the first thing I did was selecting the “Apple Vision Pro” simulator and starting a build.
As I was expecting, the build failed. Because not all frameworks support the visionOS platform yet. But adding basic support was easy. Here are the 4 steps:
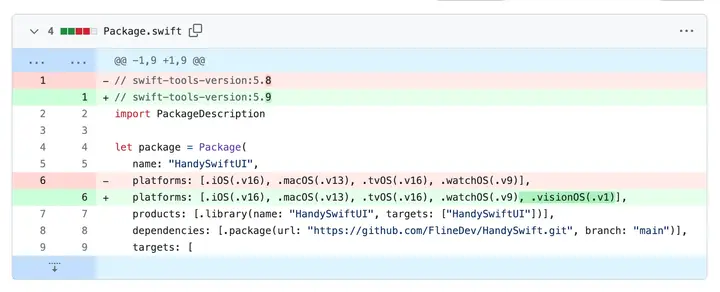
Step 2: Adjusting the Package.swift file is the most important step.
Fork the dependency, remove it from your project & add your fork with the
mainbranch instead.Open the
Package.swiftfile in the fork, bump the Swift tools version at the top of the file to5.9and add.visionOS(.v1)to the supportedplatformsarray.Search for any mentions of
#if os(iOS)and change them to#if os(iOS) || os(visionOS)to avoid building the macOS path, preferring the iOS path.Select the “Apple Vision Pro” simulator and build the project to confirm.
If you get an error due to missing APIs, make sure to add #if !os(visionOS) checks at the right places. Most APIs should be available though, as visionOS is a fork of iPadOS as Apple officially confirmed. If a feature is not there, it will either come soon or it doesn’t make sense on the platform anyway.
In my case, only for my own ReviewKit library I had to disable some code around SKReviewController which isn’t available on visionOS yet. So my library effectively does nothing when building for visionOS, but my iOS & Mac apps will continue asking users to the rate the app. I could have fixed that with a custom UI, but I decided to wait for this years WWDC first, hoping we’ll get it there already.
Don’t forget to post a Pull Request to the original repo if you forked it, so others in the community can profit from your fix as well. The more people do this, the less dependencies you have to add platform support yourself. 💪
Testing my App in the Simulator
After fixing all the dependencies, I built my app and it succeeded! 🥳
Unfortunately, I was not done yet. First off, while the app was launching, I saw that there was no App Icon shown although I have one in my project. Also, after it launched, I immediately discovered a bunch of other issues. Here’s an overview:
The App Icon was missing
When moving the cursor (= gaze), the Hover Shape was off in some places
The Layout & Sizes of many windows, modals, and my UI elements were off
My Accent Color did not have a legible contrast to the glassy background
All of these points will affect every single app migrating to visionOS. For me, small adjustments helped fix them though. Let me share my learnings one by one.
App Icon
It turns out, visionOS has its own App Icon style. They are circular like on watchOS, but they consist of multiple layers to create a sense of depth, like on tvOS. You add a visionOS app icon by pressing the + button and choosing “visionOS App Icon”. Then, you need to provide at least a “Front” and “Back” layer image of size 1024 x 1024. The “Middle” layer is optional.
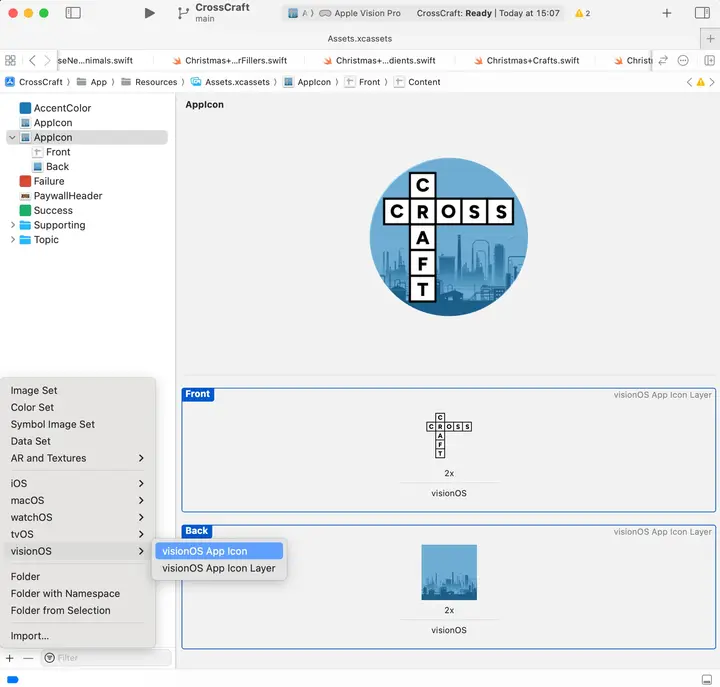
In my case, my app icon already consisted of a background layer and an icon in the foreground, so it was not a big deal to export them separately. I just had to remove the “Middle” layer in the right pane. But because I had a shadow applied to my foreground icon, and the Human Interface Guidelines state that we should “avoid using soft or feathered edges” for the non-background layers, I had to remove the shadow. The system will add a slight shadow on hover automatically.
Speaking of hover, Xcode provides a preview of how your app icon will look like at the top, and when you hover your mouse over it, it simulates the 3D hover effect when users will look at your app icon on the Vision Pro, which is really handy!
Xcodes preview of your app icon.
Hover Effects
In visionOS, one of the things that are easy to miss in the Simulator but extremely important when actually using the device are proper hover effects. As you select elements on the device with your eyes, it is important your app gives feedback about which element is currently selected. This works great out of the box with Stringly-based control APIs in SwiftUI, such as Button("Click me") { ... }.
But as soon as you provide a custom label parameter to a button, or even have your entirely custom controls, you will need to provide the exact shape of your control to the system. For example, I’m using a custom control I call HPicker which I use instead of the default drop-down Picker when I have only 2-4 options to choose from. It ended up looking like this when hovering over an option:
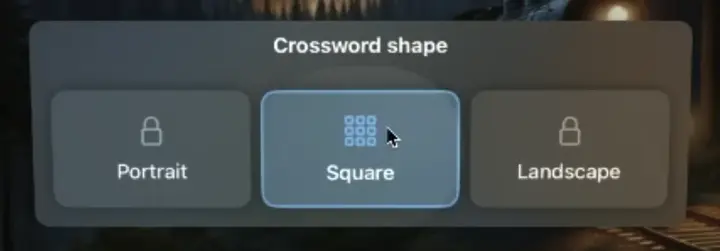
My custom HPicker view without any Hover Effect adjustments.
Adjusting it to follow the shape of the options was easy enough:
Button {
   // ...
} label: {
   Label(option.description, systemImage: option.symbolSystemName)
      // ...
      .clipShape(.rect(cornerRadius: 12.5))
      #if !os(macOS)
      .contentShape(.hoverEffect, .rect(cornerRadius: 12.5))
      .hoverEffect()
      #endif
}
Simplified version of the buttons inside my HPicker component.
The .contentShape and .hoverEffect modifiers are what I added for a proper hover effect. Replace .rect(cornerRadius: 12.5) with whatever the shape of your custom control is. Note that I wrapped them in a #if !os(macOS) check as my app supports macOS, but .hoverEffect is not available on it. Also, note that placing these modifiers outside the Button did not work for me, they have to be placed inside the label definition to work properly.
In some situations, you might notice that you have a hover effect where you don’t expect one. For me, this was the case when I provided a Button inside another view that already is recognized as a control, like this DisclosureGroup:
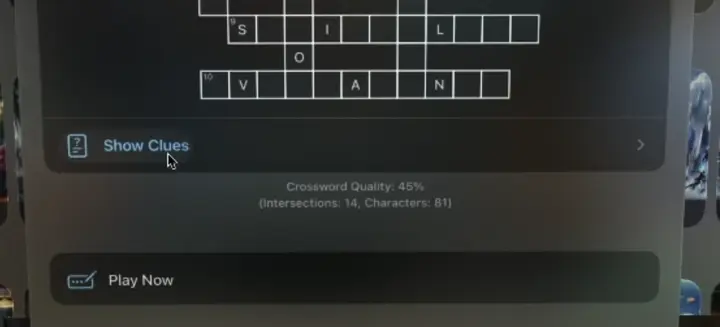
The entire “Show Clues” row is a button, but the button inside is another button.
You can turn off the hover effect by just adding the .hoverEffectDisabled() modifier. In my case above, the inner button was only added for macOS (because a DisclosureGroup doesn’t toggle when pressing the label on that platform). So my fix was to only use a Button inside on macOS and to use a simple Label else.
Making all controls have a proper hover effect was actually the most time-consuming task of the migration and took ~40 minutes. It would probably have been much faster if SwiftUI previews worked in my project, but for some reason they wouldn’t build for me, and when I tried, my Mac would start hanging. 🤷♂️
Layout System
While visionOS is based on iPadOS and therefore renders things like Form views similar to the iPad, it’s important to understand that there’s actually a key difference when it comes to the layout system compared to iOS/iPadOS:
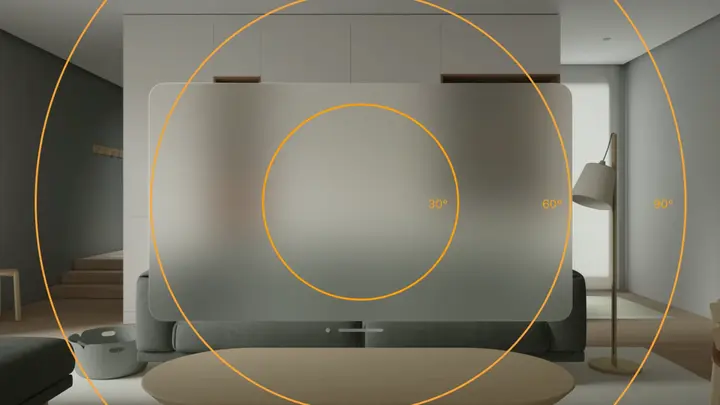
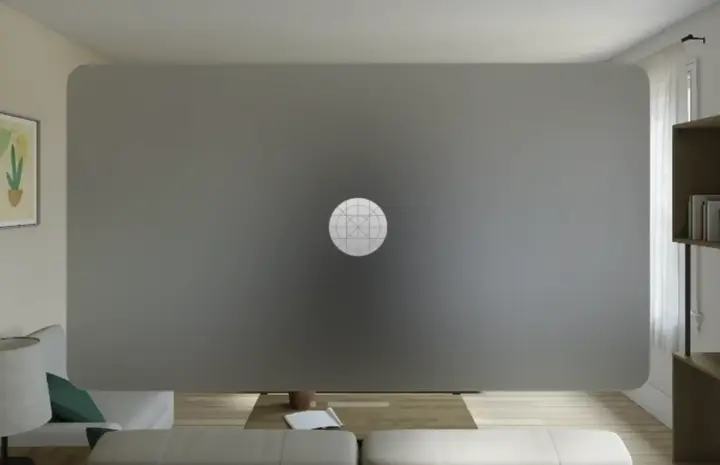
A person’s field of view inside the Apple Vision Pro. Source: HIG
On Apple Vision apps are opened in an infinite canvas, there’s no fixed screen width or height your views can derive their size from. This is a key difference you need to understand. If you have developed apps for macOS, you will already be familiar with this difference. In many ways, the layout system is much closer to that of macOS where monitors can also have differing sizes and windows are very rarely opened using the full-screen space like they do on iOS & iPadOS.
So, if your app already supports macOS, you can simply opt for the #if os(macOS) branches that you will most probably have many of already when it comes to sizing or window management. Just replace with #if os(macOS) || os(visionOS).
The main difference even to macOS is that windows have rounded corners with a large corner radius. So I found I had to add extra padding to the top & bottom of my window root views, e.g. using .padding(.vertical, 10).
If you don’t have your app optimized for macOS yet, here are some key learnings:
You need to provide
.frame(minWidth: 400, minHeight: 300)for your views all over the place, otherwise your windows or modals might have sizes that don’t work for your UI. Make sure to check them all and provide proper values.While you should specify
minWidthandminHeightfor your views so users can’t resize them to become too small for your content, you might additionally want to provide a larger.defaultSize(width: 800, height: 600)on yourWindowGroupscene to default to a larger size than the minimum.If you have modal views that cover your entire screen and also need that space, you will want to consider moving these modals to their own windows instead. Utilize the
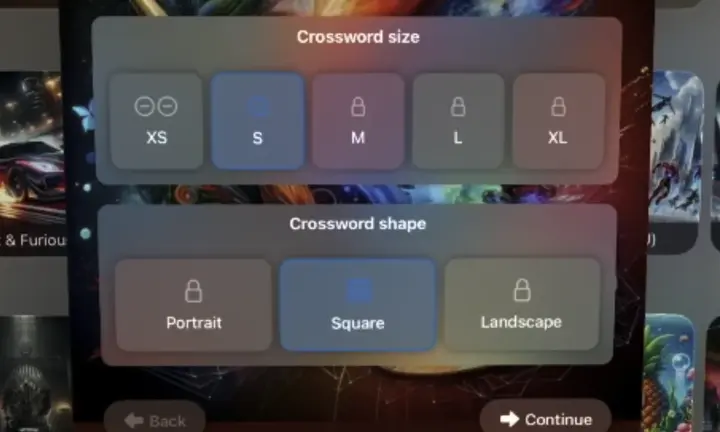
@Environment(\.openWindow) var openWindowproperty to open new windows on visionOS (and macOS) and specify additionalWindowGroupviews. See my article about window management in SwiftUI 4 to learn more.You can decide to keep the modals for your initial migration instead of using external windows, which would be the proper solution. But note that unlike on macOS, modal sheets in visionOS are not resizable. So at least make sure to provide a size that works well for your sheet for all kinds of potentially dynamic data shown in the modal. That’s what I did for “playing a puzzle” in CrossCraft.
Colors
Note that any controls with a white background will not play well with the hover effect, because the effect uses a white overlay. White on top of white isn’t visible. I ran into this for my crossword puzzle game mode, where users press on tiles to enter characters. Note how the cursor is on a tile but the hover isn’t visible:
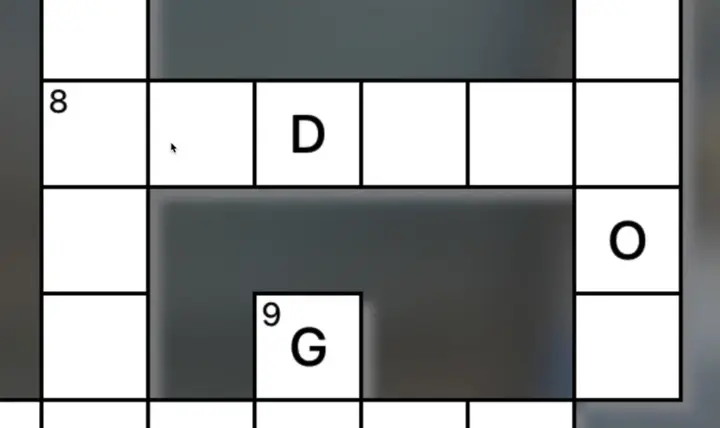
Hovers are not visible on white background buttons.
My quick fix was to add the modifier .opacity(0.85) making my white backgrounds 15% transparent, which helped already. More would be better, but white is an expected “crossword” color, so I tried to keep it as white as possible.
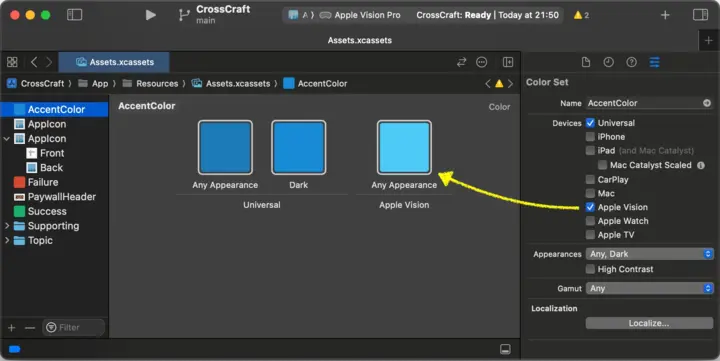
Colors that are legible on iOS might not work on visionOS.
I also noticed that many mid-contrast colors, including the system default “blue” accent color, have a really bad contrast on the default window glass background. Make sure to make these colors brighter for visionOS. You can add a specific variant for “Apple Vision” using the Attributes inspector with a color selected.
💡 To make a color brighter using the HSB system, you need to decrease the saturation slightly and increase the brightness significantly. You can additionally move the hue a little bit towards the closest bright RGB value. Refer to this article to learn more about how to make colors brighter/darker properly utilizing HSB.
Conclusion
If you have an app that’s already on iPadOS & macOS, you’re in a very good spot to add support for visionOS. You will be able to reuse all your SwiftUI code. When it comes to window management, you should opt for the macOS version. For everything else, opt for the iPadOS version. Then, ensure all your custom controls have a proper hover effect. Make some layout & UI adjustments like adding padding, making colors brighter, or splitting your app icon to a front & back part.
The entire process took effectively 2 hours for me. I live-streamed the entire process, you can find my recordings with the “wait for build” & “chat” removed in the following two YouTube videos, each roughly an hour long. Note that I added time codes for the different steps outlined above so you can dive into specifics: